Mouse
Pydoll drives the mouse two ways: through an element you found, which is what you want most of the time, or at raw page coordinates when you need precise positions. Both support humanize=True, which moves the cursor along a curved, human-timed path instead of teleporting to the target.
Click an element
The common case is clicking an element you already located with find() or query(). Call click() on it; you don't compute coordinates, and the element is scrolled into view first.
from pydoll.sync import Chrome

def main():
    with Chrome() as browser:
        tab = browser.start()
        tab.go_to('https://the-internet.herokuapp.com/add_remove_elements/')

        add_button = tab.find(text='Add Element')
        add_button.click()

        # the click added a Delete button
        delete = tab.find(class_name='added-manually')
        print('Added:', delete.text())

main()
import asyncio

from pydoll import Chrome


async def main():
    async with Chrome() as browser:
        tab = await browser.start()
        await tab.go_to('https://the-internet.herokuapp.com/add_remove_elements/')

        add_button = await tab.find(text='Add Element')
        await add_button.click()

        # the click added a Delete button
        delete = await tab.find(class_name='added-manually')
        print('Added:', await delete.text())

asyncio.run(main())
click() takes a few options:
humanize=True works wherever the element lives: in the main document, inside an iframe (a cross-origin one included) and inside a shadow root. An out-of-process iframe has its own viewport coordinates, so its elements move a cursor of their own, tracked separately from the tab's.
Element click vs raw coordinates
Prefer element.click(). It finds the element's position for you and survives layout changes. Reach for the coordinate API below only when there is no element to target, such as clicking inside a <canvas> or dragging a handle by pixel.
Hover over an element
hover() moves the cursor onto the element and stays there, which is how you open menus that expand on mouseover and tooltips that show on hover. The element is scrolled into view first, and humanize=True moves along a curved path instead of jumping.
Double-click an element
double_click() sends two clicks with the timing and click counts the page needs to fire a dblclick event, so text selection, inline editors and "open item" handlers respond as they would to a real double-click. It takes the same x_offset, y_offset and humanize options as click().
The coordinate mouse API
tab.mouse clicks, moves, and drags at explicit coordinates in CSS pixels, measured from the top-left of the page. You usually get those coordinates from an element's bounds (see Drag a slider).
from pydoll.sync import Chrome
from pydoll.protocol.input.types import MouseButton

def main():
    with Chrome() as browser:
        tab = browser.start()
        tab.go_to('https://the-internet.herokuapp.com/')

        tab.mouse.move(500, 300)                        # move the cursor
        tab.mouse.click(500, 300)                       # left click
        tab.mouse.click(500, 300, button=MouseButton.RIGHT)  # right click
        tab.mouse.double_click(500, 300)               # double click
        tab.mouse.drag(100, 200, 500, 400)             # press, move, release

main()
import asyncio

from pydoll import Chrome
from pydoll.protocol.input.types import MouseButton


async def main():
    async with Chrome() as browser:
        tab = await browser.start()
        await tab.go_to('https://the-internet.herokuapp.com/')

        await tab.mouse.move(500, 300)                        # move the cursor
        await tab.mouse.click(500, 300)                       # left click
        await tab.mouse.click(500, 300, button=MouseButton.RIGHT)  # right click
        await tab.mouse.double_click(500, 300)               # double click
        await tab.mouse.drag(100, 200, 500, 400)             # press, move, release

asyncio.run(main())
MouseButton (from pydoll.protocol.input.types) has LEFT, MIDDLE, and RIGHT. click() also takes click_count (pass 2 for a double click) and every method takes the keyword-only humanize.
For pressing and releasing separately, down() and up() operate at the current cursor position:
tab.mouse tracks the cursor position across calls, so down()/up() act wherever the last move() or click() left it.
Move like a human
By default a move or click jumps straight to the target, which is a behavioral tell. Pass humanize=True and Pydoll moves the cursor along a curved path with human timing (a Fitts's-Law duration, a bell-shaped speed profile, small tremor, and occasional overshoot with correction):
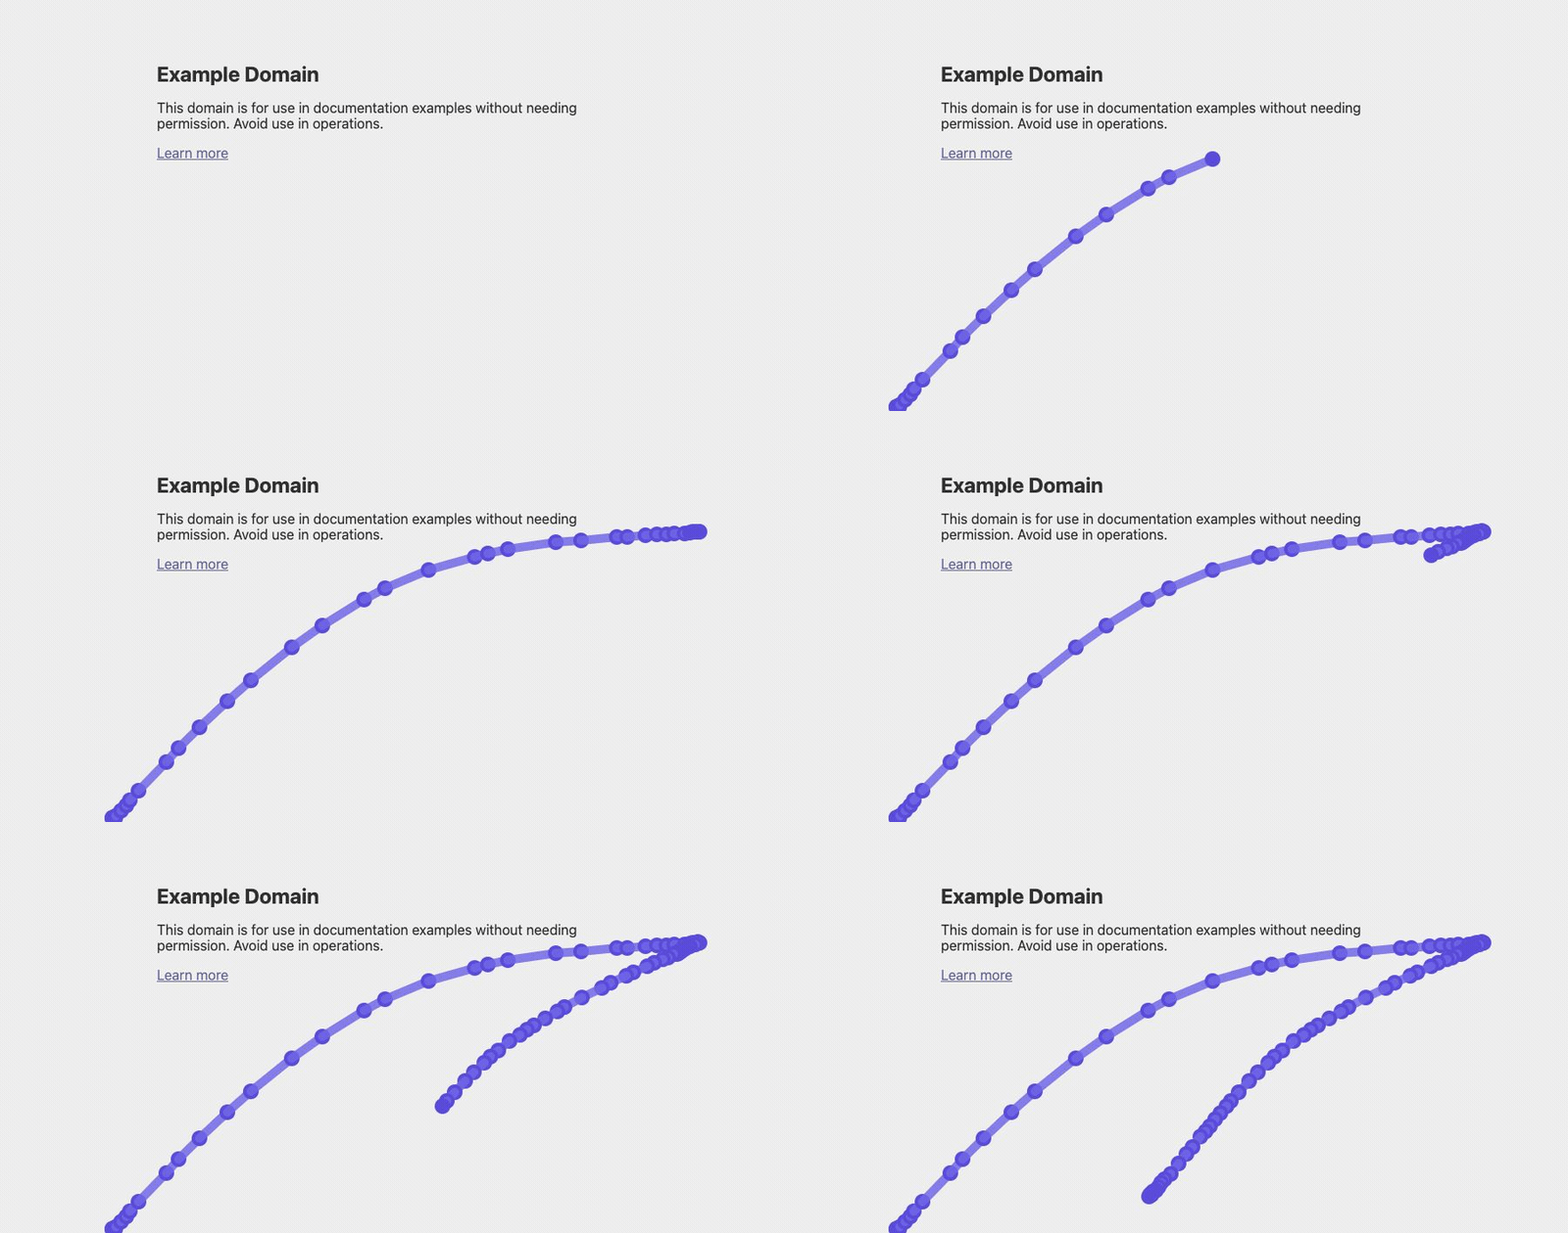
Two humanized moves: curved paths with easing and a slight overshoot, not straight jumps.
Humanized element clicks work the same way. Because the position is tracked, clicking element A then element B traces a natural curve from one to the other:
# instant: the cursor jumps straight to each target
await (await tab.find(id='first')).click()
await (await tab.find(id='second')).click()

# humanized: the cursor curves naturally from one target to the next
await (await tab.find(id='first')).click(humanize=True)
await (await tab.find(id='second')).click(humanize=True)
See Human-like interactions for the full timing model and when humanization matters.
Tune the timing
The humanized physics are configurable through MouseTimingConfig. Assign a new config to tab.mouse.timing:
from pydoll.interactions.mouse import MouseTimingConfig

tab.mouse.timing = MouseTimingConfig(
    fitts_a=0.070,               # base movement time (seconds)
    fitts_b=0.150,               # time added per bit of difficulty
    curvature_min=0.10,          # least path curvature (fraction of distance)
    curvature_max=0.30,          # most path curvature
    tremor_amplitude=1.0,        # hand-tremor sigma in pixels
    overshoot_probability=0.70,  # chance of overshoot on fast, long moves
    max_duration=2.5,            # cap on a single movement (seconds)
)
Every field has a default, so override only what you need. See the MouseTimingConfig dataclass in pydoll/interactions/mouse.py for the full list.
Watch the cursor while tuning
Set tab.mouse.debug = True and Pydoll draws the cursor path on a transparent overlay: blue dots trace movement, red dots mark clicks. Use it to check that humanized paths look natural, then turn it off.
Practical examples
Drag a slider
Read the handle's position from its bounds, then drag from there:
slider = await tab.query('.slider-handle')
bounds = await slider.get_bounds_using_js()   # {'x', 'y', 'width', 'height'}, viewport pixels

start_x = bounds['x'] + bounds['width'] / 2
start_y = bounds['y'] + bounds['height'] / 2

await tab.mouse.drag(start_x, start_y, start_x + 200, start_y, humanize=True)
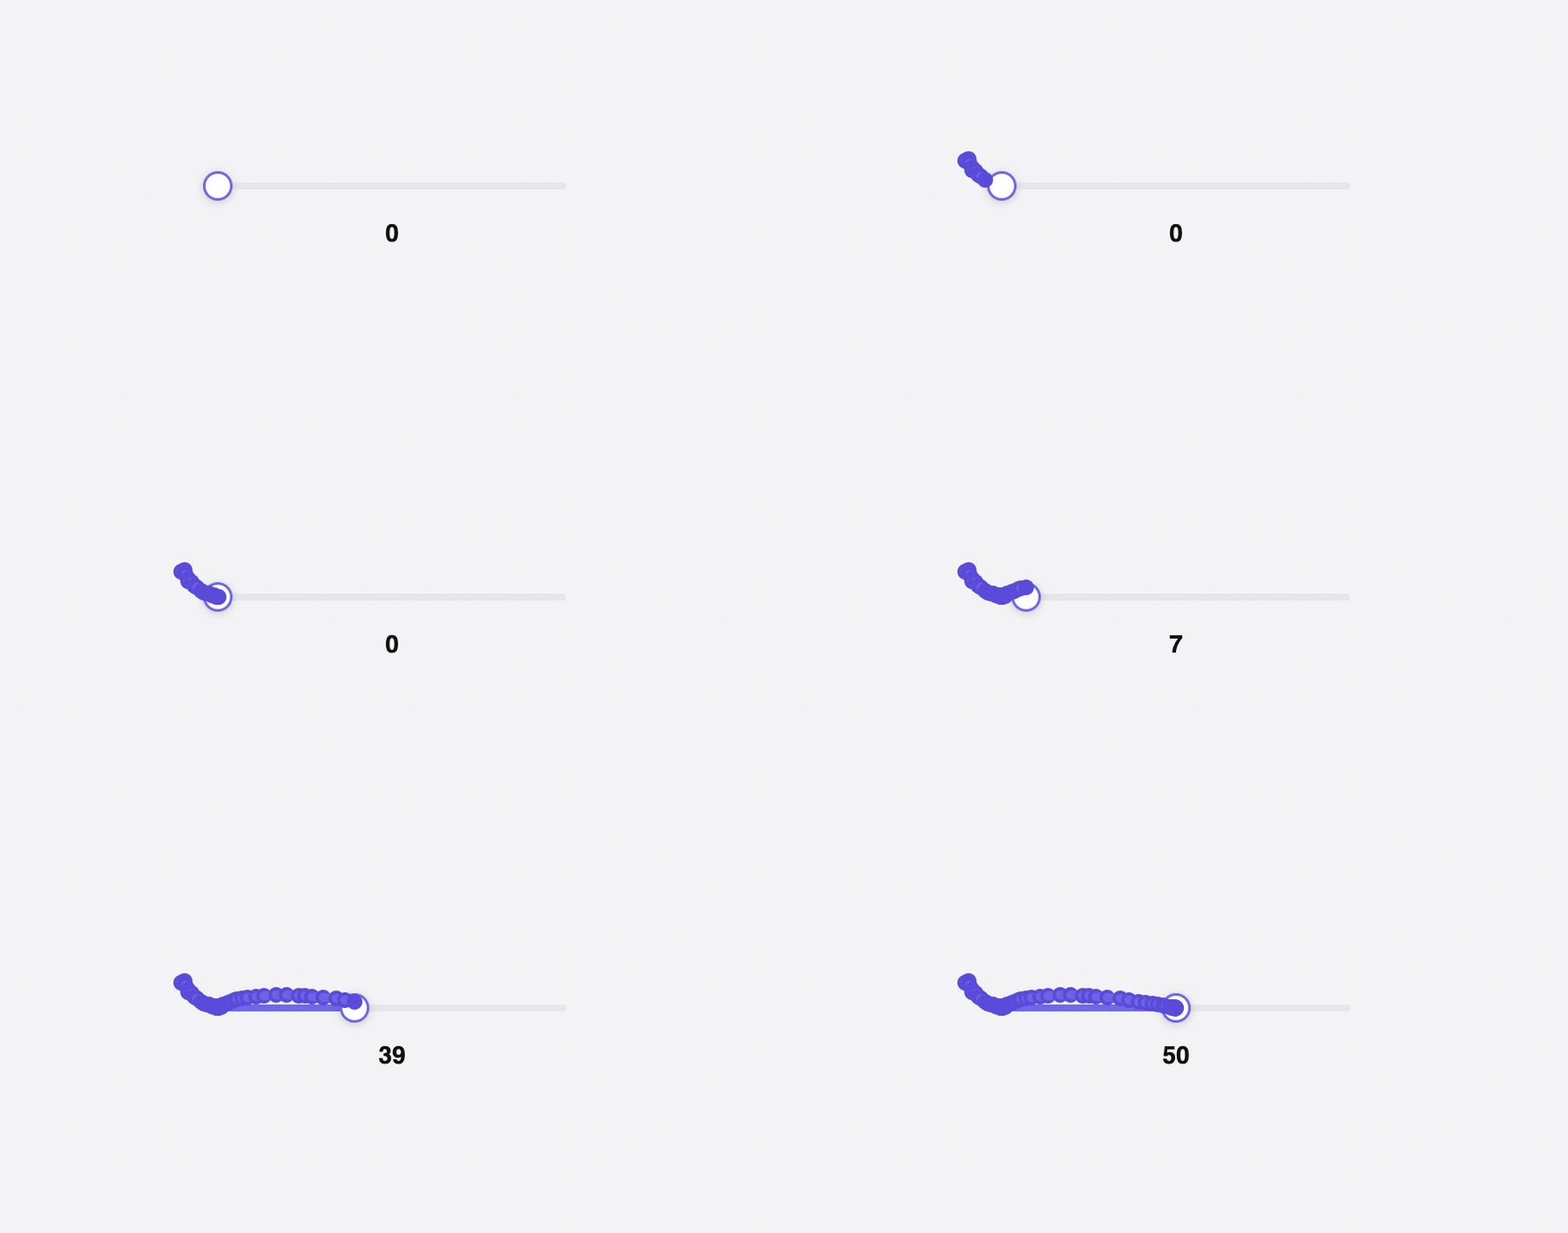
Dragging the handle along a humanized path.
Hover over a menu
Move the cursor onto an element to trigger its CSS :hover state, without clicking:
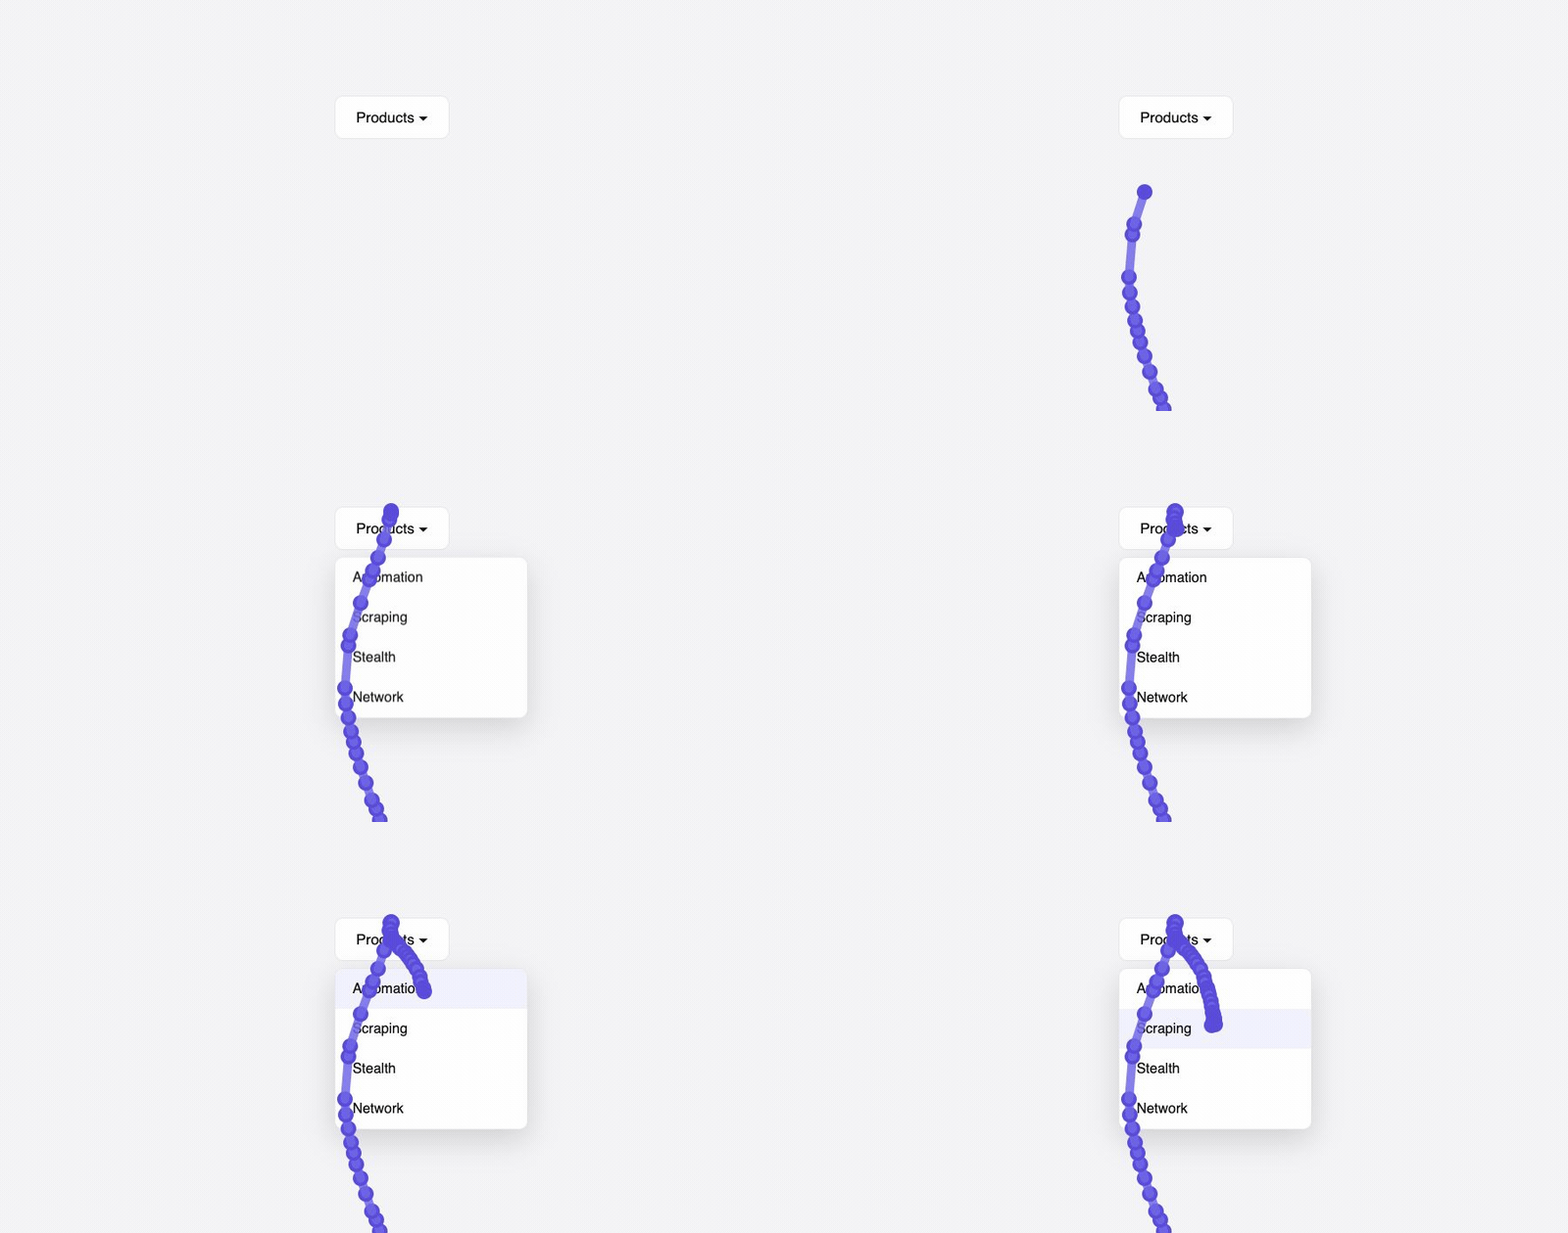
Moving onto the trigger, the dropdown expands and the cursor settles on an item.
What's next
- Keyboard: type text and press keys, with the same humanized timing.
- Human-like interactions: the timing model behind
humanize=Trueand when to use it. - Element finding: locate the elements you click and drag.